Woo Hoo! Time to get back to the Tour de' Raleigh!
This weekend lead me out towards two of my favorite local antique stores. Quickly though, let's refer back to my original posting, and remember what to expect from an "antique store" -- lots of *lovely* items, therefore slightly higher prices. Also, many antique stores are stocked by numerous vendors, hopefully ensuring a wide range of goods. The vendor will rent a small space to sell their belongings, and the store will collect a portion of the vendor's profits. So, now that we know what to expect, let's start the tour.
My first stop was at Thieves Market. Thieves Market is located right off the beltline on New Bern Ave. This antique mall holds over 200+ booths! I'm pretty sure you can find just about anything you are looking for. The staff here are always helpful and very friendly.
This is also a great place to search for furniture. Every time I have been, I have noticed an abundance of fantastic furniture pieces. I will say this store tends to lean more towards 30's/40's/50's shabby chic. It's not exploding with many mid-century pieces or funky knickknacks, but do not let that dissuade you from exploring. I'm almost positive you won't walk out empty-handed!
Enjoy a few snippets from my visit ...
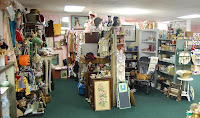
My next stop was at Gresham Lake Antiques. This little gem is located in North Raleigh, off of Capital Boulevard. Gresham Lake is another very large antique mall with 80+ booths. I adore the staff here -- these ladies always give me a good laugh and are super helpful.
I feel like this antique mall has a wider variety of dealers -- 30's/40's ephemera, 60's/70's kitsch, and even one dealer with a vast array of salt and pepper shakers. Gresham tends to be a bit lean on larger furniture, but they do have pieces sprinkled throughout the store.
A quick glance of some various booths ...
So, if you find yourself with some free time on a weekend afternoon, first, tell me how you managed to score some free time, and then make your way out to one of these antique malls. I promise you won't be disappointed.
Sunday, October 26, 2008
Saturday, October 25, 2008
Controlling the clutter
We have very little storage in either of our bathrooms. However, in the hallway next to the bathroom upstairs, we have a small little closet the houses most of our toiletries and various bathroom sundries. I tried my best to organize it using baskets and boxes, but it is hard to make 50+ bottles of various shapes and sizes appear "put together."
Enter a favorite thrift store find -- the card catalog. I had posted a while back that I had scored a small card catalog from Hidden Treasures. I had originally thought it would be home to some kind of crafting supplies. But, as I was hauling the catalog upstairs, the idea occurred to me that it could solve my organizational dilemma in the bathroom closet. And in fact, it did.
Keep on creating y'all!
Wednesday, October 22, 2008
Estate Sale? Check.
First, my apologies for such a long break in posting. I've been sick for about 2 1/2 weeks now. My doctor said I had a viral infection that gave way to a bacterial infection. Basically it adds up to feeling like crapola for the last two weeks. But ...
All thanks to a little encouragement from Vintage Rescue Squad, I decided to embark on my first ever estate sale. I skimmed craigslist to find a local sale. Bingo! There was one not too far from the house, in a pretty nice neighborhood, and it had a billiards lamp for sale.
This was the first thing I saw on Saturday morning. What the hell-o am I thinking? But, onward and upward (even if in the dark), with my loving and supportive husband in tow.
We arrived about ten minutes after the sale began, and there were people already leaving the sale! Geesh -- some people are serious. I immediately made a beeline for the "playroom" and spotted the pool table (with a price) and the billiards lamp (without a price). I inquired about the lamp. A nice older gentleman went to ask someone, who asked someone else, who asked someone else -- the lamp was not for sale. DRAT.
Oh well, we had trucked all this way and we were going to make the most of it. We turned around to begin exploring the rest of the room and we both laid eyes on this -- a pristine music cabinet housing a turntable, 8-track player, and stereo.
Price? 20-freaking-dollars. Yes, please. Jeff snagged the ticket and we made our way through the rest of the house. (BTW -- we now possess the ability to play any form of music media. Records, tapes, 8-tracks, cds, ipods -- BRING IT ON!)
The house ended up being in a very nice neighborhood. All the items in the house were in good/great condition -- some of the pieces were unbelievably GORGEOUS!! This made for a mix of prices. Some of the items were very high -- like the full-size headboard for $550. Some of the items were very modestly priced -- as in, all the items I picked up. Here's a snapshot of our bounty.
Mirror tray (I have been looking for one of these), set of 10 glass coasters, plant stand, framed flower pressing, a hand stitched throw pillow, and a nut chopper for my husband.
All in all, I would say this was a great experience and I am definitely motivated to do it again. Although, I'm not so sure my honey will be joining me again ... he doesn't do mornings.
Happy creating everyone!
Monday, October 06, 2008
Chairs, chairs, and more chairs!!
A plague o' both your houses ... Jeff and I are at home sick. Ick. I know this may sound rather obvious, but being sick totally sucks. I had sort of forgotten about it, since it has been a while since I've had a head cold.
We did manage to get out on Saturday for a bit (before the illness took hold). A trip to American Way Thrift turned into a gold mine. I'll go ahead and apologize for the lack of pictures for this post, but remember I'm sick.
We found a totally awesome old-school Coleman cooler in great shape for $2.00. It looks really similar to this one -- same color, but minus some of the scratches and dings.
We also got a great chair for the office. I've been wanting to exchange our office chair for something a bit more stylish. We found a great old rolley-style chair with a sweet metal base and fabric that blends perfectly with our darker office colors. Score.
One major find was this old school recliner Jeff spied. It was in decent shape -- it had a smooth recline, the foot rest sprung out without snagging, but it did have some mysterious spots on it. I figured we could try and clean it, but worse-case-scenario would be having to replace the seat cover or carefully placing a throw in just the right position. So we brought it home.
I could shoot myself for not taking a before picture, but oh well. Halfway into "redesigning" the armrests, I snapped this shot. Most of the spots had already been removed using some carpet/fabric cleaner. But, you can see the original armrests and some buttons missing.
It was time for me to take this bad boy on! In true make-over fashion, my first plan failed and I went through many trials and errors. I wanted to recover the armrests, but one was kind of flimsy, so I just scrapped them both. I found some extra padding in my craft room, and fashioned new fluffy armrests with a cloth napkin I had purchased to make a pillow (but never did).
Next were the buttons. Jeff and I did a bit of research learning how best to reupholster the buttons. Oh, here's a pretty good explanation on the basics of reupholster a chair. I'm skipping all the details of the button ordeal, but you can find a fabulous explanation here. It's not as difficult as you might think. I covered the buttons (some were originals from the chair and some I had in my supply cabinet) with matching fabric that I used on the armrest -- one because I thought it would look really great, and two because I needed a way to make a matching set of nine.
After much debate about where to place our new friend, we settled with a slight re-arrangment in our office/library. We now have a new cozy corner to work and read. I love it ... Jeff does too.
Happy creating, y'all ...
Saturday, October 04, 2008
Designing small spaces -- Paint a stairway
Since we moved into our current home, I have always wanted to do something to the staircase. It's challenging to decorate -- the walls and ceiling are high making it difficult to paint, it's also fairly narrow making it too small to hang lots of pictures/prints. So what to do??
There's TONS of inspiration out there. Tile. Wallpaper. Mosaic. Paint. Numbers. Hooked Rugs?
My first thought was to tile the riser. Then, I moved on to wallpaper. We looked a several styles of wallpaper, but to quote Jeff, "we just never pulled the trigger on this mo-fo." Well, leave it to another late night to get motivated to do something.
The ACE design team on the project included Jeff, me, and our friend Joe. After many different design options, we decided to go with a sunburst effect using various colors from around the house. Joe pushed hard for a flower and sun sketch, but I thought a more basic design would be easier to execute. Here's the design board.
We lined the stairs with rope to be our guide lines for the burst. We started to paint away!! Not long into the process, we realized that perhaps our genius idea had been encouraged a bit by our libations. Our two-dimensional guide lines going over the three-dimensional stair case didn't translate so well. Crap.
At this point, it was time to go back to the drawing board, and my ACE design team is fading fast ... they are both two winks away from passing out on the couch. This project was quickly moving away from fun-times-decorating-late-at-night to I-F@#&ing-want-to-stab-my-eyes-out-with-this-paint-brush. So what's a girl to do? Well, that I night I decided to just go to bed.
The next morning, I woke up hoping to feel a bit more refreshed and encouraged. I took one quick look at the stairs and longed to leap back in time so I could smack myself before embarking on thiscatastrophe journey. The weekend was quickly fading and I needed to pump something out here ... and FAST! So I decided to take the easy way out, and just paint the riser one solid shade of blue ... a blue that I ADORE (it's the color of my bathroom).
Oooh, here's a nice shot that shows how the blue stairs transition into the blue bathroom. I really liked how that turned out. Another perk of the painted stairs is how lovely it looks when walking DOWN the stairs. We have a mirror that hangs over the staircase and it's like a little surprise to take in a burst a color on the way down.
I hope this inspires you to add a little touch of style somewhere in your house. It doesn't have to be as involved as this. Hang a new picture. Buy some fresh cut flowers. Add a colorful pillow to your living room. You might be surprised how much of an impact a little something extra can make in any room.
Happy creating everyone ...
There's TONS of inspiration out there. Tile. Wallpaper. Mosaic. Paint. Numbers. Hooked Rugs?
My first thought was to tile the riser. Then, I moved on to wallpaper. We looked a several styles of wallpaper, but to quote Jeff, "we just never pulled the trigger on this mo-fo." Well, leave it to another late night to get motivated to do something.
The before.
The ACE design team on the project included Jeff, me, and our friend Joe. After many different design options, we decided to go with a sunburst effect using various colors from around the house. Joe pushed hard for a flower and sun sketch, but I thought a more basic design would be easier to execute. Here's the design board.
We lined the stairs with rope to be our guide lines for the burst. We started to paint away!! Not long into the process, we realized that perhaps our genius idea had been encouraged a bit by our libations. Our two-dimensional guide lines going over the three-dimensional stair case didn't translate so well. Crap.
At this point, it was time to go back to the drawing board, and my ACE design team is fading fast ... they are both two winks away from passing out on the couch. This project was quickly moving away from fun-times-decorating-late-at-night to I-F@#&ing-want-to-stab-my-eyes-out-with-this-paint-brush. So what's a girl to do? Well, that I night I decided to just go to bed.
The next morning, I woke up hoping to feel a bit more refreshed and encouraged. I took one quick look at the stairs and longed to leap back in time so I could smack myself before embarking on this
The after.
Oooh, here's a nice shot that shows how the blue stairs transition into the blue bathroom. I really liked how that turned out. Another perk of the painted stairs is how lovely it looks when walking DOWN the stairs. We have a mirror that hangs over the staircase and it's like a little surprise to take in a burst a color on the way down.
I hope this inspires you to add a little touch of style somewhere in your house. It doesn't have to be as involved as this. Hang a new picture. Buy some fresh cut flowers. Add a colorful pillow to your living room. You might be surprised how much of an impact a little something extra can make in any room.
Happy creating everyone ...
Subscribe to:
Posts (Atom)